Using OpenImageIO to quickly edit an EXR display window
At the office, I was being asked about how to use Nuke to do some image manipulation to resize an image and twizzle the display and data windows. We could, of course, do this in Nuke as a kind of general -purpose image processor but it can be a tad overkill when all you need to do is fix some metadata. Might I suggest OpenImageIO?
(This code sample is written in a bit of a conversational style, you can make this much, much, better, however this might be a lot easier to read. For context as well, this was inspired by a convo with Hugo Sutton at work the other day.)
Nuke Script & Support Files
There’s one nuke script, plus four EXRs to fetch:
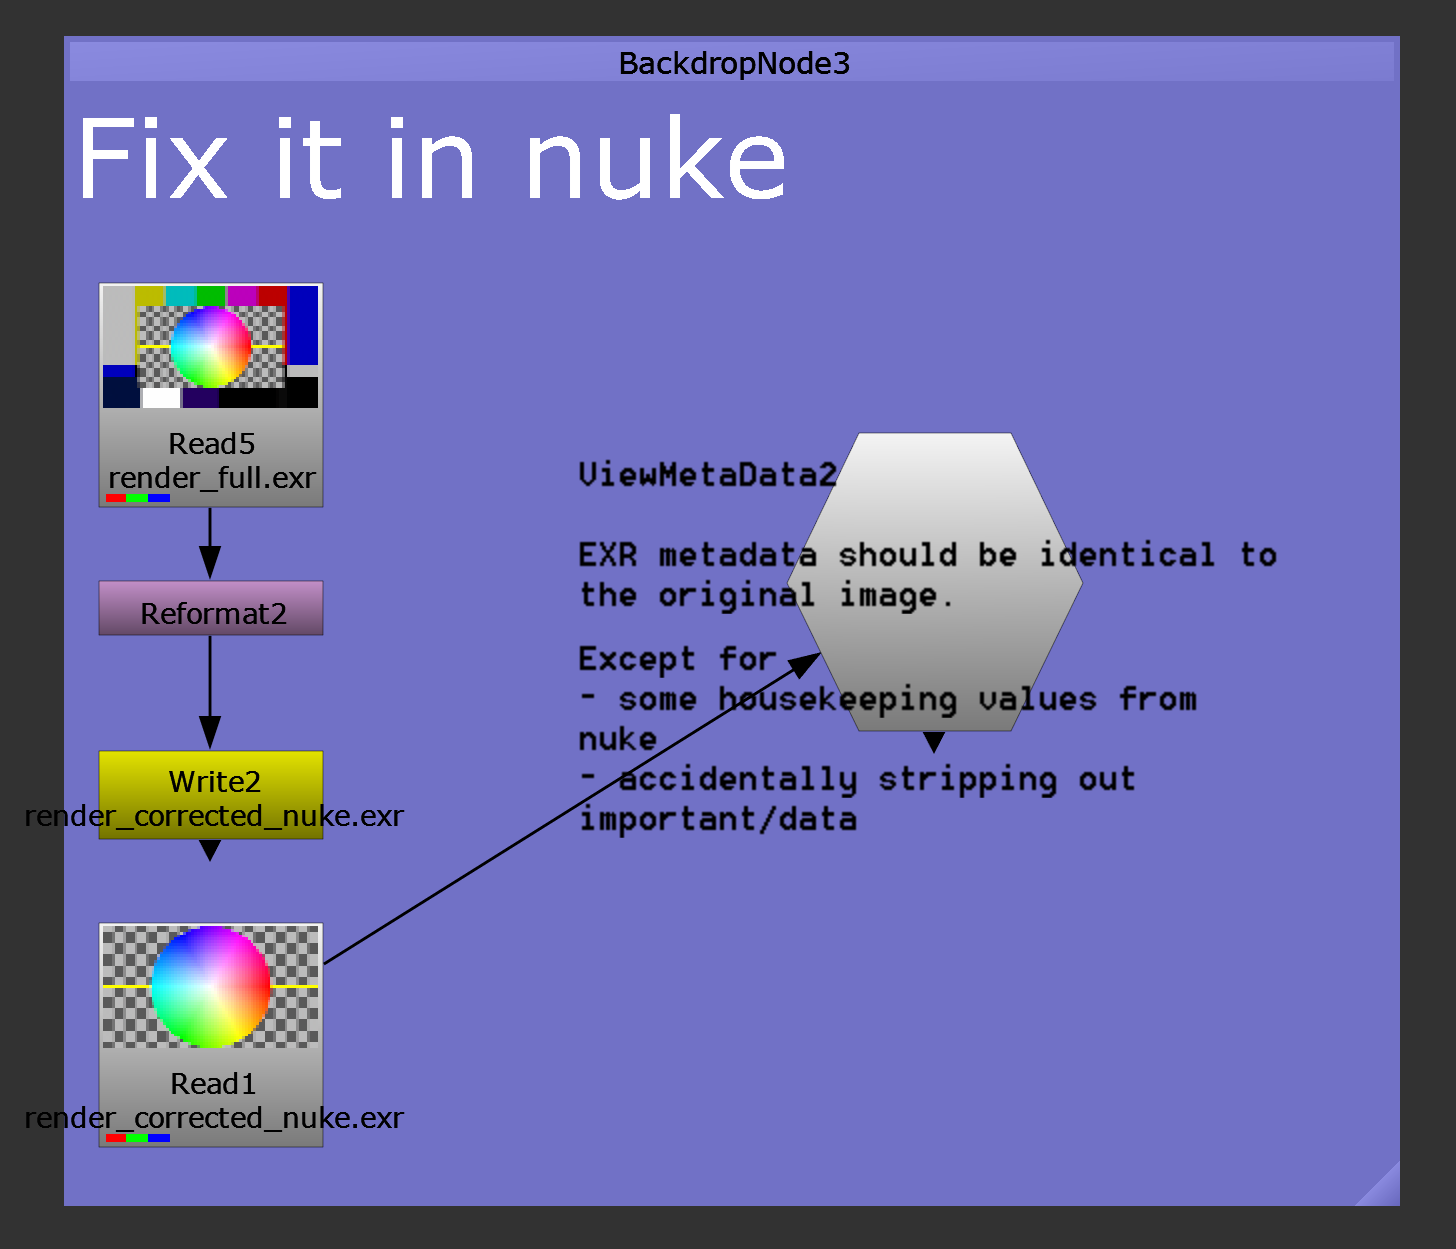
- render_full.exr : our render with all the pixels
- render_corrected_nuke.exr : our render that we ran through nuke to reformat
- render_corrected_oiio.exr : our render corrected via OpenImageIO
- render_corrected_tool.exr : same same, just using Oiiotool
- some python scripts so don’t have to type as much stuff
- the .nknc script you can use to inspect it
Grab the lot here (2,457kb)
Overview
Essentially what we’re doing here is noticing that the pixels are all there, and they’re all what we want, but our display and data windows are the same. If we bring this into nuke on the B stream, then nuke will think we want to work at this resolution.
We can fix this in nuke, but honestly, all we’re doing is we’re tweaking some metadata (this applies to all metadata btw) so firing it up is probably gross overkill. You can do this in a more lightweight fashion.
Python and OpenImageIO
Let’s look at the target and the fix from nuke as our gold standard as it’s
likely to be where we grab the image, manipulate it and make sure we’re happy
with the results. I’ve used a reformat node - pretty standard.
Throw open a shell and give this a whirl to inspect things:
message = """\
        Data ROI: {data_roi}
        Disp ROI: {disp_roi}
      all pixels: {px}x{py}
  display window: {dx}x{dy}"""

import OpenImageIO as oiio

target_image = oiio.ImageInput.open('./render_corrected_nuke.exr')
image_spec = target_image.spec()  # the Spec is the file specification.

# NOTE: "Full" might sound confusing, but recall that often you have full frame
# but you only render a tiny CG element hence the ROI is smaller.
# For Overscan, this is confusing, but you know.. we had to pick _a_ term.
print ("Target image spec says..")
print (message.format(
            px=image_spec.width,
            py=image_spec.height,
            dx=image_spec.full_width,
            dy=image_spec.full_height,
            data_roi=oiio.get_roi(image_spec),
            disp_roi=oiio.get_roi_full(image_spec))
        )
print ("-"*10)

# let's inspect what we have for our 'oversize' render
base_image = oiio.ImageInput.open('./render_full.exr')
image_spec = base_image.spec()  # the Spec is the file specification.
print ("Source image spec says..")
print (message.format(
            px=image_spec.width,
            py=image_spec.height,
            dx=image_spec.full_width,
            dy=image_spec.full_height,
            data_roi=oiio.get_roi(image_spec),
            disp_roi=oiio.get_roi_full(image_spec))
        )
print ("-"*10)
which should give you this:
[playpen]:tanant@cuberdon:/mnt/c/Users/tanant/oiio$ python3 inspect.py
Target image spec says..
        Data ROI: -320 1600 -180 900 0 1 0 3
        Disp ROI: 0 1280 0 720 0 1 0 3
      all pixels: 1920x1080
  display window: 1280x720
----------
Source image spec says..
        Data ROI: 0 1920 0 1080 0 1 0 3
        Disp ROI: 0 1920 0 1080 0 1 0 3
      all pixels: 1920x1080
  display window: 1920x1080
----------
You can see that the target image has a display window of 720p, and the data window is 1080p sized, but it’s shift/offset to the left and down. What we call 0 is just a reference point. We can redefine these, without touching any pixels - which we’ll see now:
base_image = oiio.ImageInput.open('./render_full.exr')  # open our source
new_image_spec = base_image.spec()  # lets take the old spec as our starting point

# you'll need to calculate this, obviously
oiio.set_roi(new_image_spec, oiio.ROI(-320, 1600, -180, 900))
oiio.set_roi_full(new_image_spec, oiio.ROI(0, 1280, 0, 720))

output = oiio.ImageOutput.create('./render_corrected_oiio.exr')
# In 2.0.5 which i'm using, you do not pass the third arg.
# In 1.7 which we have at work, you do.
# output.open('./render_corrected_oiio.exr', new_image_spec, oiio.Create)
output.open('./render_corrected_oiio.exr', new_image_spec)

# Note the copy_image call - we do _not_ want to uncompress/recompress
# pixels needlessly. Let's leave the CPU alone to finish calculating bokeh.
output.copy_image(base_image)
output.close()
# tadah!
oiiotool and well, OpenImageIO
Most likely, if you have got OpenImageIO, you’re going to have oiiotool handy
as a ginsu knife of sorts. You can easily bolt this into a pipeline/subprocess
if you don’t have or want to fire up a python interpreter:
> oiiotool render_full.exr --origin -320-180 --fullsize 1280x720 -o render_corrected_tool.exrOr in english, dear oiiotool please:
- Shift the origin left by 320 pixels, down by 180
- Make the ‘full’ size the 720p center zone
- Dump it out, thanks
Metadata!
Last, but not least, don’t overlook the fact that we’re preserving metadata using oiiotool and our python approach above. If you do it right (and by default, with oiiotool), you’re going to add a few extra fragments but you’re really, really, really, unlikely to clobber metadata. This is going to be important when you’re processing renders, you don’t want to wipe out critical info (like.. oh, a header for cryptomatte?)